正如上期视频末尾预告的,本期教程分享一下,在 Shopify 产品页添加 Tabs 功能,点击可切换显示不同内容。
第 159 期 一行代码在Shopify联系表单中附带产品页信息
在 Shopify 询盘中附带客户咨询的产品页信息,避免客服或运营再去询问客户问的是哪款产品。
 Shopify2006
更高级的用法
- 添加设置项,可直接在店铺后台修改元字段或 Page 引用
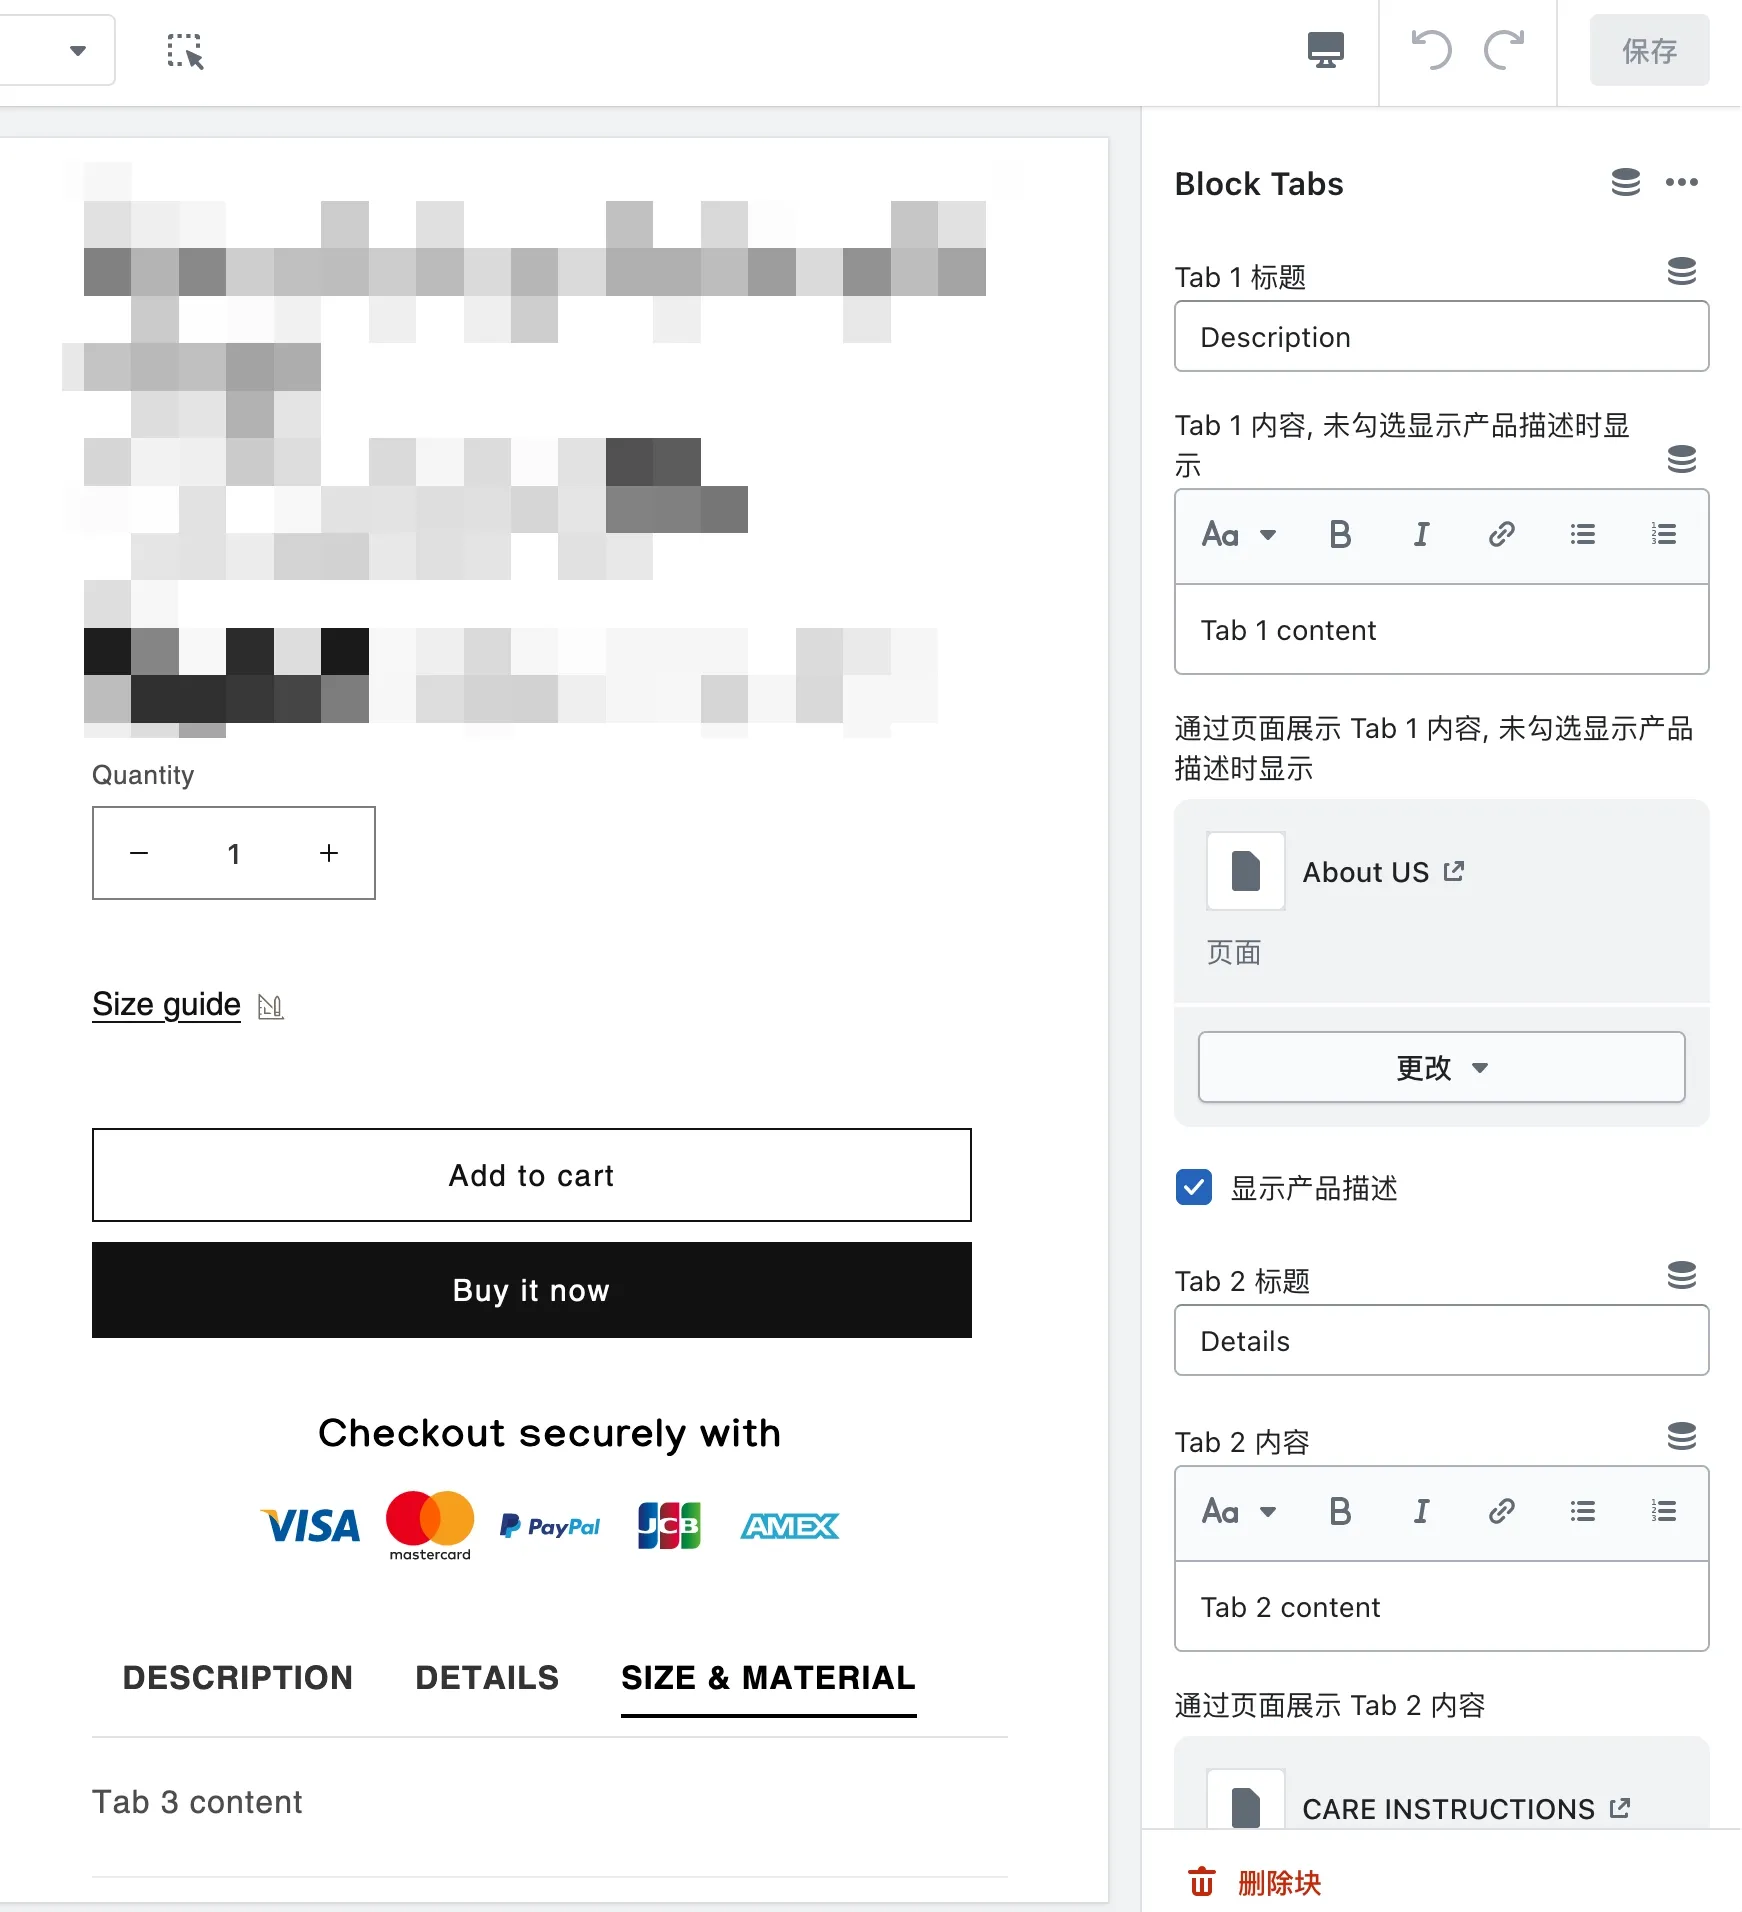
普通用法(参考视频演示)
- 一键复制下方提供的代码
- 在产品页面添加 Custom Liquid 模块
- 粘贴代码之后替换显示的标题和内容
<style>
      /* Tabs container */
      .tabs {
        display: flex;
        justify-content: space-evenly;
        border-bottom: 1px solid #e1e1e1;
        padding-bottom: 10px;
        margin-bottom: 20px;
      }

      /* Individual tab */
      .tab {
        font-size: 16px;
        font-weight: 600;
        color: #333;
        cursor: pointer;
        position: relative;
        padding-bottom: 5px;
        text-transform: uppercase;
      }

      /* Active tab */
      .tab.active {
        color: #000;
      }

      /* Active tab indicator */
      .tab.active::after {
        content: "";
        position: absolute;
        bottom: -1px;
        left: 0;
        width: 100%;
        height: 2px;
        background-color: #000;
      }

      /* Tab content container */
      .tab-content {
        display: none;
        line-height: 1.5;
        font-size: 16px;
      }

      /* Active tab content */
      .tab-content.active {
        display: block;
      }

      .tab-content > p {
        padding-left: 20px;
      }
    </style>

    <div class="tabs">
      <div class="tab" id="tab1" onclick="switchTab(event, 'description')">
        Description
      </div>
      <div class="tab" id="tab2" onclick="switchTab(event, 'details')">
        Details
      </div>
      <div class="tab" id="tab3" onclick="switchTab(event, 'size')">
        Material
      </div>
    </div>

    <div id="description" class="tab-content">
      <p>{{ product.description }}</p>
    </div>

    <div id="details" class="tab-content">
      <p>
        Lorem, ipsum dolor sit amet consectetur adipisicing elit. Sunt doloribus
        pariatur explicabo. Veniam, ad molestias. Atque officiis ex quae vitae!
      </p>
    </div>
    <div id="size" class="tab-content">
      <p>Size and material information goes here...</p>
    </div>
  <script>
      document.addEventListener("DOMContentLoaded", function () {
        document.getElementById("tab1").click();
      });

      function switchTab(evt, tabName) {
        let tabcontent, tablinks;
        tabcontent = document.getElementsByClassName("tab-content");
        for (let i = 0; i < tabcontent.length; i++) {
          tabcontent[i].style.display = "none";
        }

        tablinks = document.getElementsByClassName("tab");
        for (i = 0; i < tablinks.length; i++) {
          tablinks[i].className = tablinks[i].className.replace(" active", "");
        }

        document.getElementById(tabName).style.display = "block";
        evt.currentTarget.className += " active";
      }
</script>还没有自己的店铺?点击这里 1 元开店或创建插件测试/免费试用店铺
第 143 期 一元开店 低成本拥有你自己的 Shopify 店铺
限时福利:既可用于创建新的店铺,也可以创建测试店铺(例如免费试用插件 APP 等),避免测试插件时代码残留在主题中,拖慢店铺网速。
Shopify2006